Spring Flower Cookies by Michelle Thornburg

Well, I decided my blog would be about all things I love, not just my art, but cooking, crafts, hobbies, and all things fun, so here we go...Spring Flower Cookies with Lemon Drops!

cookie2.jpg

The floral towel is from the Pioneer Woman collection. We love the cooking channel and instead of watching cartoons in the morning my daughter chooses to watch the Pioneer Woman while eating breakfast. 

We found an easy recipe on the Food Network. They used the already made sugar cookie dough and dum dum lollipops. But we just thought the sticks would be too small. So instead we used cake pop sticks and lemon drops. This gave the flower cookies a m…

We found an easy recipe on the Food Network. They used the already made sugar cookie dough and dum dum lollipops. But we just thought the sticks would be too small. So instead we used cake pop sticks and lemon drops. This gave the flower cookies a much longer stem. Then we used a tsp to scoop the dough into a half sphere and place around the lemon drops. The yellow from the lemon drops makes a nice bright spring color! 

2.jpg

Place them on parchment paper and bake as directed. The lemon drops melt and the petals spread and touch sides to create the flower! Really fun for the kiddos and fast and easy! We also did a batch of chocolate chip too. 

That's it! These are perfect to display in some type of basket. We were taking these to an Easter BBQ so of course an Easter Basket was perfect for the display. We tied ribbons around each one in yellow, pink, and turquoise colors. 

That's it! These are perfect to display in some type of basket. We were taking these to an Easter BBQ so of course an Easter Basket was perfect for the display. We tied ribbons around each one in yellow, pink, and turquoise colors. 

Arrange your cookie display in the basket and enjoy! 

Arrange your cookie display in the basket and enjoy! 

From Fine Art to DIY - by Michelle Thornburg

Valentine's Day Dream Catcher:

I love Dream Catchers! I've always been fascinated with dreams since I was a kid and they fit right in with my style of painting. So of course, they hang all over my art studio. I also like to personalize them and make them for my friends as gifts. This one is for one of my very best friends who shares her birthday with Valentine's Day. Happy Birthday Nikki!  :)

Below is a picture of all the materials I used. However, these can all be swapped out with whatever fits your desired style. 

I always like to plan out my design by laying everything out on the table to visualize what the final dream catcher might look like. 

I always like to plan out my design by laying everything out on the table to visualize what the final dream catcher might look like. 

The treasure! I like to find one special thing that really reminds me of the person I am creating the dream catcher for. This sparkly heart with a  crown is perfect for the Queen of Hearts, born on Valentines with a heart of gold! I love this!&…

The treasure! I like to find one special thing that really reminds me of the person I am creating the dream catcher for. This sparkly heart with a  crown is perfect for the Queen of Hearts, born on Valentines with a heart of gold! I love this! 

You can get these metal rings at most craft stores or you can use pretty much use anything round or roundish. I'm using hemp cord to wrap around the circle and hot glue to hold it in place. 

You can get these metal rings at most craft stores or you can use pretty much use anything round or roundish. I'm using hemp cord to wrap around the circle and hot glue to hold it in place. 

Continue all the way around the circle.  

Continue all the way around the circle.  

Here is what it looks like once you've wrapped all the way around the circle. 

Here is what it looks like once you've wrapped all the way around the circle. 

Next take your string, I'm using an artificial sinew and loop it around the ring. I made 10 intervals once it reached back to the top.

Next take your string, I'm using an artificial sinew and loop it around the ring. I made 10 intervals once it reached back to the top.

Here is what it will look like once you've gone all the way around. 

Here is what it will look like once you've gone all the way around. 

Tip: I found it easier to wrap my string around a pencil so that it weaves in and out of the webbing easier. 

Tip: I found it easier to wrap my string around a pencil so that it weaves in and out of the webbing easier. 

Now loop the string over and back up the first line of string, like shown above. Continue this same loop around each of the 10 original sections created. This will create the webbing of your dream catcher. 

Now loop the string over and back up the first line of string, like shown above. Continue this same loop around each of the 10 original sections created. This will create the webbing of your dream catcher. 

4.jpg
This is what it will look like once you gone around three times. 

This is what it will look like once you gone around three times. 

Continue until you reach the center. Here I tied on the heart jewel so it would hang directly in the middle. 

Continue until you reach the center. Here I tied on the heart jewel so it would hang directly in the middle. 

Now you can tie feathers, beads, or ribbon to hang on  your dream catcher. I am using all of the above! 

Now you can tie feathers, beads, or ribbon to hang on  your dream catcher. I am using all of the above! 

Since this one is a Valentine's theme I am stringing red and clear beads and adding a feather dipped in glitter! You can dip them yourself or buy feathers with glitter already on them. I got these at Hobby Lobby already dipped in glitter and perfect…

Since this one is a Valentine's theme I am stringing red and clear beads and adding a feather dipped in glitter! You can dip them yourself or buy feathers with glitter already on them. I got these at Hobby Lobby already dipped in glitter and perfect for this dream catcher. 

After stringing your beads tie them to the bottom of your dream catcher.

After stringing your beads tie them to the bottom of your dream catcher.

Continue to add your beads and feathers. I found these pretty pink flowers to add the final touch to this dream catcher. Have fun creating your own! For more inspiration check out my website at www.michellethornburgart.com

Continue to add your beads and feathers. I found these pretty pink flowers to add the final touch to this dream catcher. Have fun creating your own! For more inspiration check out my website at www.michellethornburgart.com

From Fine Art to DIY Basics I've Got You Covered by Michelle Thornburg

Down by the Water, 36" x 36", Acrylic on Canvas

This one started with a 36" x 36" canvas. I find it best to purchase these online from a craft store it always seems to save me a lot of money. 

I'm using Acrylic paints and I have to admit I usually use a paper plate over a palette, I'm pretty messy, so this is easy and works. 

I'm using Acrylic paints and I have to admit I usually use a paper plate over a palette, I'm pretty messy, so this is easy and works. 

I apply the paint with my hands directly to the canvas.  

I apply the paint with my hands directly to the canvas.  

Here is the beginning stage of the process.

Here is the beginning stage of the process.

Dream Catchers always hang above my easel. I create them myself and love to give them out as gifts. They will be on my website soon along with some DIY tips.

Dream Catchers always hang above my easel. I create them myself and love to give them out as gifts. They will be on my website soon along with some DIY tips.

Here are some photos of the process. 

Here are some photos of the process. 

6.jpg
7.jpg
8.jpg
9.jpg
O.k. I might have stopped taking as many photos here, sometimes it's hard to interrupt painting. 

O.k. I might have stopped taking as many photos here, sometimes it's hard to interrupt painting. 

I added some very fine black glitter. It's hard to see here but I used the brand, Distress Glitter, in black. 

I added some very fine black glitter. It's hard to see here but I used the brand, Distress Glitter, in black. 

I couldn't' get a good photo of the glitter but here is a close up. The cool part about this glitter is it is so fine you can't see it in all lights but when the light hits it just right it glistens. In the final version it makes the water glisten.&…

I couldn't' get a good photo of the glitter but here is a close up. The cool part about this glitter is it is so fine you can't see it in all lights but when the light hits it just right it glistens. In the final version it makes the water glisten. 

My art buddy Junior!

My art buddy Junior!

Here is the finished painting. If you try out this style of painting, let me know how it goes. Happy Painting Everyone! 

Here is the finished painting. If you try out this style of painting, let me know how it goes. Happy Painting Everyone! 

Painting From Your Imagination 101 by Michelle Thornburg

 I really love to paint! So how did it start, how and why, did I start painting in this style? In this, “style” I mean painting from the subconscious, which evolved into adult finger painting for lack of a better word. I always really liked art but it wasn’t until college when I took a painting class that I discovered I love art, particularly painting. I loved it so much that I switched from wanting to be a Kindergarten teacher to wanting to be an artist and art teacher. I literally had that moment of “this is what I’m meant to do.” Switching my career plan wasn’t easy it meant more classes and more time in college but it also meant I got to paint and take more art classes! The class that really helped me find my personal style was a class I was least excited about taking. It was titled, Painting from your Imagination. The title alone was intimidating because I wasn’t that kind of artist, you know the kind of artist where someone could say “Paint a dragon” and the artist creates this amazing realistic dragon from their imagination without referencing anything. That type of artist was not me, when I painted I needed to observe something, I needed something to measure, or reference, or see. But I thought what the heck and enrolled.

I was pleasantly surprised with the class. We were not told what to paint, in fact it was the exact opposite we were just told to paint. Paint without thinking about it. This was painting from your imagination, not my preconceived idea which would have been more like painting from your memory. Now telling students to just paint, I can see how this could be intimidating for some artists, I’m sure some were stumped. But my paint started flowing onto the canvas, I was in the zone. It’s kind of hard to explain how it works, but you just let go and let your brush or hands take the lead, don’t try too hard, don’t push for anything specific to happen, let it happen. Then you take a step back and look at your creation. This part taps into the conscious because now you are looking at your lines, and drips, and shapes, and the coolest thing happens, you see something, something you did not plan to paint but somehow you painted it, it’s there, appearing out of nowhere. That’s always my favorite part! I guess you can think about it as looking up at the clouds and then seeing something very specific staring at you. I’m sure we’ve all done that, but these are your clouds you created them. At this point you can keep painting or bring out your image if you feel enticed to do so. 

That was it for me I was hooked on painting in this style. The drive to paint something realistic drifted away from me as a distant thought. I never painted for anyone else but myself. I never painted so I could sale my art, or be a famous artist, I just painted to paint. I guess my amazing friends are to blame for making me step out of my comfort zone and share my art with the world. I was content with hoarding it all to myself and for years that is exactly what I did. So it is 2018 and I am honoring my New Year’s resolution. I actually created a website and let go of a few paintings and here we are. I’m excited to share my art with you!!!

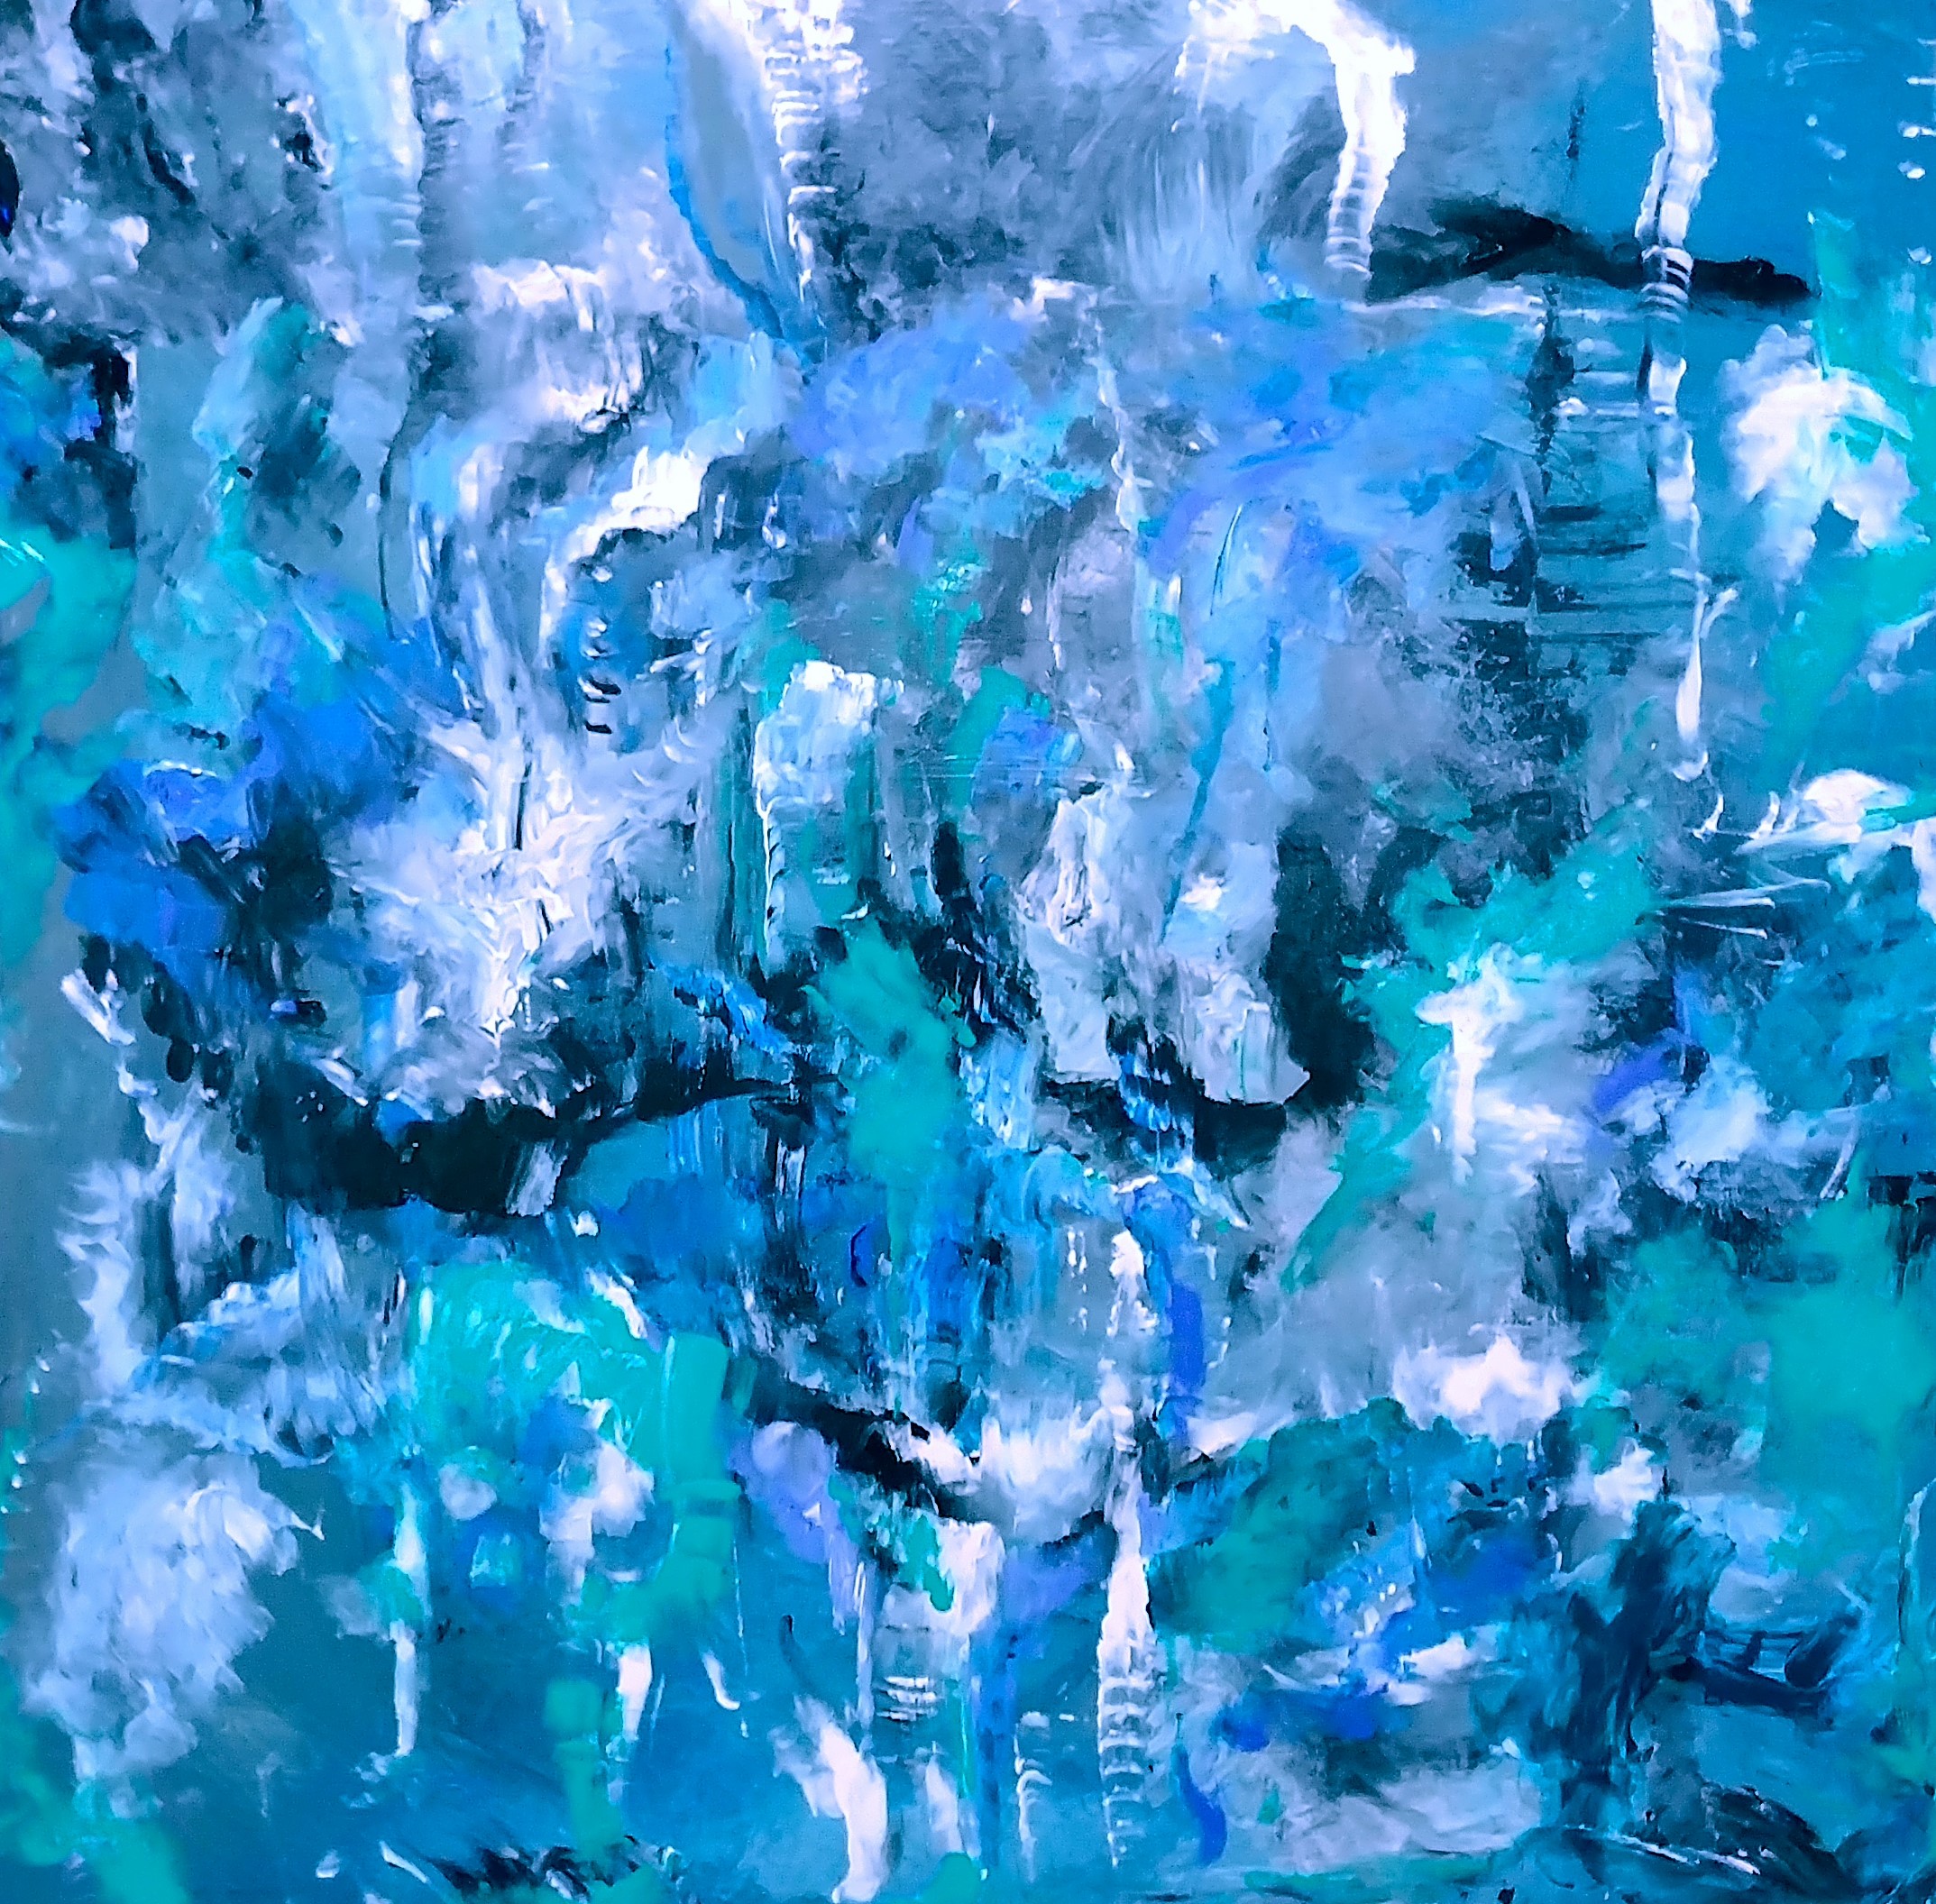
So here is my latest painting, I snapped photos along the way to try to capture the process or at least parts of it.

Blank canvas on a Friday Night! 

Blank canvas on a Friday Night! 

I’m using acrylic paint here, but I also love oil. Acrylic dries fast so it is probably easiest for this, but oil can make some fantastic drips!

I’m using acrylic paint here, but I also love oil. Acrylic dries fast so it is probably easiest for this, but oil can make some fantastic drips!

I used my hands to apply the paint, you could use brushes or a palette knife or whatever inspires you.

I used my hands to apply the paint, you could use brushes or a palette knife or whatever inspires you.

4.jpg
Now we're having fun!

Now we're having fun!

6.jpg
7.jpg
8.jpg
9.jpg
There she is all finished! What should her name be…Title suggestions anyone?

There she is all finished! What should her name be…Title suggestions anyone?